sonarqube是一套代码质量检测工具,支持的语言有java,python,golang,C#等等接近二十多种,我们为什么会选择sonarqube作为代码质量检测,优秀的图形页面是您一目了然,可以查询代码的问题,比如空指针异常,内存泄露等等问题都可以通过sonarqube检查出来,功能还是非常强大的。下面先说一下我遇到的一些坑,避免在安装的时候继续踩,首先Sonarqube从7.9以上版本开始不在支持mysql,jdk必须是11版本,如果你的语言是java,Sonarqube的jdk版本必须要和jenkins的版本一致,否则会报错。Sonarqube7.9以上版本即成了gitlab和github,不需要单独的安装sonar-gitlab-plugin-4.1.0-SNAPSHOT ,下面我用7.5版本的做个例子进行安装,这里说明一下安装后不能直接使用需要配置一下,会在下个章节进行说明。
首先,如果没有安装数据库,需要先安装一下数据库,这里记得mysql的版本必须是5.5以上版本,低于5.5版本启动的时候会报错,如果不会安装mysql可以参考:https://www.wulaoer.org/?p=220。我这里已经安装好了mysql,直接创建sonarqube数据库,并授权账号和密码,因为我这里是测试的所以设置的密码简单了一点。
[root@www.wulaoer.org ~]# mysql -uroot -p
Enter password:
Welcome to the MySQL monitor.  Commands end with ; or \g.
Your MySQL connection id is 86
Server version: 5.7.30-log Source distribution

Copyright (c) 2000, 2020, Oracle and/or its affiliates. All rights reserved.

Oracle is a registered trademark of Oracle Corporation and/or its
affiliates. Other names may be trademarks of their respective
owners.

Type 'help;' or '\h' for help. Type '\c' to clear the current input statement.
mysql> CREATE DATABASE sonar CHARACTER SET utf8 COLLATE utf8_general_ci;
Query OK, 1 row affected (0.00 sec)

mysql> CREATE USER 'sonar' IDENTIFIED BY 'sonar';
Query OK, 0 rows affected (0.00 sec)

mysql> GRANT ALL ON sonar.* TO 'sonar'@'%' IDENTIFIED BY 'sonar';
Query OK, 0 rows affected, 1 warning (0.00 sec)

mysql> GRANT ALL ON sonar.* TO 'sonar'@'localhost' IDENTIFIED BY 'sonar';
Query OK, 0 rows affected, 1 warning (0.01 sec)

mysql> FLUSH PRIVILEGES;
Query OK, 0 rows affected (0.01 sec)
因为Sonarqube中有ES,所以我们需要设置一下系统的基本环节,需要以root的身份进入系统,并创建一个普通用户,否则会在启动的时候ES启动错误。
[root@www.wulaoer.org ~]# vi /etc/sysctl.conf
vm.max_map_count=262144
fs.file-max=65536
[root@www.wulaoer.org ~]# vi /etc/profile
ulimit -n 65536#保存后运行#source /etc/profile 使其生效
source /etc/profile
[root@www.wulaoer.org ~]# groupadd sonar
[root@www.wulaoer.org ~]# useradd sonar -g sonar
需要安装一下jdk,这里也不在叙述了,我已经安装好了,如果不会的话可以参考:https://www.wulaoer.org/?p=487 下面开始下载sonarqube,在https://binaries.sonarsource.com/Distribution/sonarqube/这里有不同的版本可以参考。
[root@www.wulaoer.org ~]#  wget https://binaries.sonarsource.com/Distribution/sonarqube/sonarqube-7.5.zip
[root@www.wulaoer.org ~]# unzip sonarqube-7.5.zip -d /usr/local/sonarqube/
[root@www.wulaoer.org ~]# cd /usr/local/sonarqube/
[root@www.wulaoer.org sonarqube]# mv sonarqube-7.5/* .
配置一下sonarqube,主要是web服务和数据库的连接信息.
[root@www.wulaoer.org sonarqube]# vim conf/sonar.properties
# DATABASE
#
# IMPORTANT:
# - The embedded H2 database is used by default. It is recommended for tests but not for
#   production use. Supported databases are MySQL, Oracle, PostgreSQL and Microsoft SQLServer.
# - Changes to database connection URL (sonar.jdbc.url) can affect SonarSource licensed products.

# User credentials.
# Permissions to create tables, indices and triggers must be granted to JDBC user.
# The schema must be created first.
sonar.jdbc.username=sonar     #去掉注释
sonar.jdbc.password=sonar      #去掉注释

#----- Embedded Database (default)
# H2 embedded database server listening port, defaults to 9092
#sonar.embeddedDatabase.port=9092

#----- DEPRECATED
#----- MySQL >=5.6 && <8.0
# Support of MySQL is dropped in Data Center Editions and deprecated in all other editions
# Only InnoDB storage engine is supported (not myISAM).
# Only the bundled driver is supported. It can not be changed.
sonar.jdbc.url=jdbc:mysql://localhost:3306/sonar?useUnicode=true&characterEncoding=utf8&rewriteBatchedStatements=true&useConfigs=maxPerformance&useSSL=false
.......................................
# Binding IP address. For servers with more than one IP address, this property specifies which
# address will be used for listening on the specified ports.
# By default, ports will be used on all IP addresses associated with the server.
sonar.web.host=10.211.55.6      #去掉注释
保存配置,启动Sonarqube,启动时需要注意三个服务,分别是sonar服务,web服务,es服务的日志,都是在logs目录下,启动的时候看一下日志
[root@www.wulaoer.org sonarqube]# su sonar bin/linux-x86-64/sonar.sh start
[root@www.wulaoer.org sonarqube]# su sonar bin/linux-x86-64/sonar.sh stop
[root@www.wulaoer.org sonarqube]# su sonar bin/linux-x86-64/sonar.sh
Usage: bin/linux-x86-64/sonar.sh { console | start | stop | restart | status | dump }
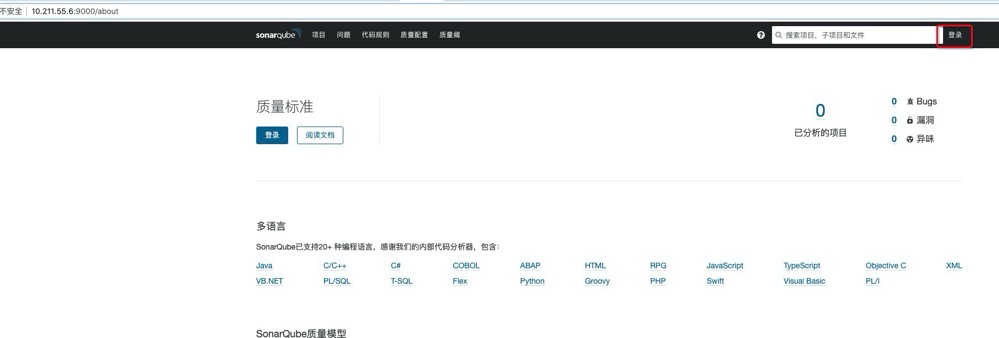
启动成功后直接访问http://IP:9000即可,用户密码都是admin,默认的,不过登录成功后是英文的,如果需要汉化可以参考:https://github.com/xuhuisheng/sonar-l10n-zh 根据自己安装的版本下载对应的语言包,这里有一个表可以参考一下。我的是7.5版本的,下载的语言包是1.25,https://github.com/xuhuisheng/sonar-l10n-zh/tags这里是所有不同版本的。下载好自己对应的语言包,放到/usr/local/sonarqube/extensions/plugins/这个目录下即可,然后重启一下sonarqube。看一下我的安装成果。
没有登录,需要等一下一下,看一下登录等效果。
登录成功,这里只能说明sonarqube是搭建好了,但是我们要想利用sonarqube做代码分析还远远不够的,不过没事,可以看一下下一个章节是如何利用sonarqube结合gitlab做代码穿透的。


您可以选择一种方式赞助本站
支付宝扫一扫赞助
微信钱包扫描赞助
赏